Google's Gemini CLI supports the SKILL.md standard, enabling developers to leverage the same AI-powered skills that work seamlessly in Claude Code and Codex CLI without any need for modification. This interoperability means that once you create or acquire a skill for one platform, you can immediately use it in another, streamlining your workflow and boosting productivity. In this guide, we’ll walk you through everything you need to know to get started with Gemini CLI skills, from installation and setup to practical usage and best practices.
Understanding Gemini CLI Skills and SKILL.md
At its core, a Gemini CLI skill is a modular, reusable piece of AI functionality defined by a special markdown file named SKILL.md. This file contains structured metadata, instructions, and prompts that the Gemini CLI uses to perform specific tasks such as code generation, refactoring, or documentation. By adhering to the SKILL.md standard, skills are portable and compatible across multiple AI coding platforms, including Claude Code and Codex CLI. This uniformity reduces the learning curve and encourages community sharing of high-quality skills.Where Gemini CLI Stores Skills
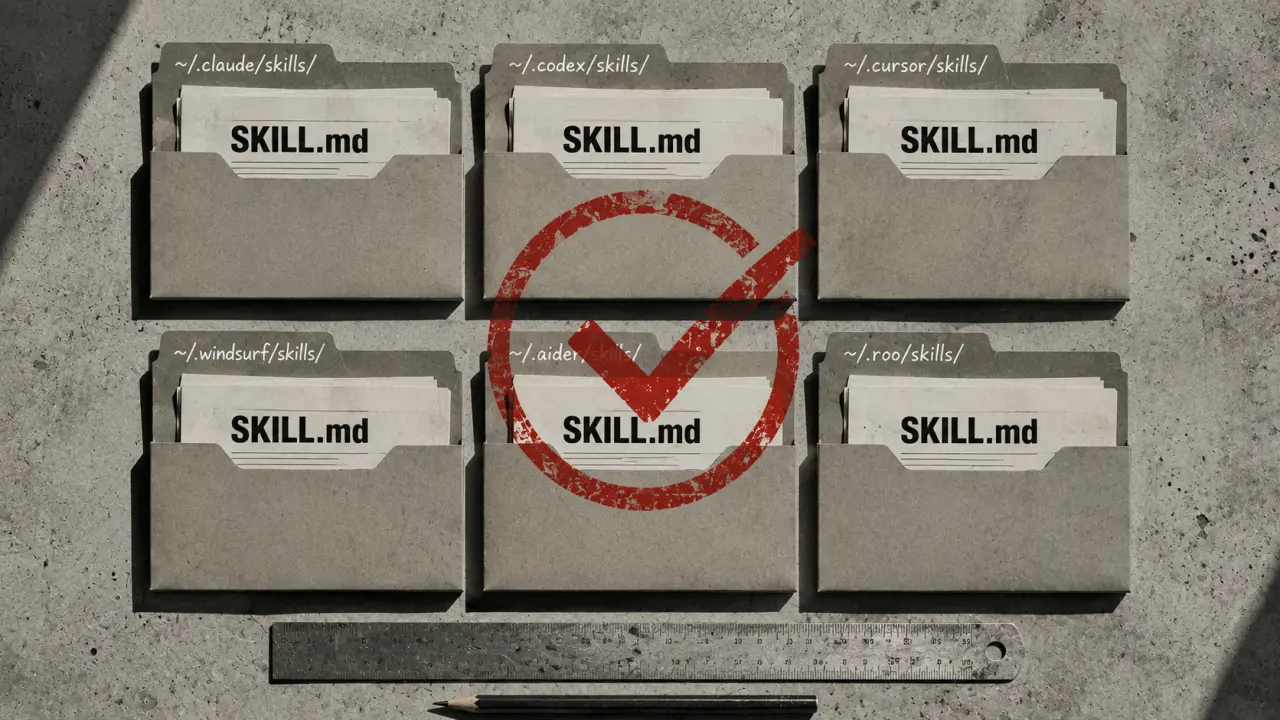
Gemini CLI organizes skills into two main categories: personal skills and project-specific skills. Knowing where to place your skills is essential for proper configuration and usage.- Personal Skills: These are stored globally in your home directory under `~/.gemini/skills/`. Skills placed here are accessible across all your projects and sessions.
- Project Skills: These are stored locally within a given project, in a hidden folder named `.gemini/skills/` located at the root of your project directory. These skills apply only when working inside that specific project.
The directory structure for each skill remains consistent: each skill resides in its own folder, which contains a SKILL.md file. This setup mirrors the organization used by Claude Code, making it straightforward for users transitioning between platforms.
Installing Gemini CLI and Setting Up Your Environment
Before you can start using Gemini CLI skills, you need to install the Gemini CLI tool itself. Here's a step-by-step guide:1. Download and Install Gemini CLI: Visit the official Gemini CLI repository or download page to get the latest version compatible with your operating system (Windows, macOS, Linux).
2. Set Up Environment Variables: Depending on your OS, ensure the Gemini CLI binary is accessible via your PATH environment variable for easy command-line access.
3. Verify Installation: Run `gemini --version` in your terminal or command prompt to confirm successful installation.
4. Initialize Gemini in Your Project: Navigate to your project directory and run `gemini init` to create necessary configuration files and the `.gemini/skills/` folder if it doesn’t exist already.
Following these steps ensures you have a solid foundation to start adding and using skills.
Creating Your First SKILL.md
Creating your own skill is a great way to tailor Gemini CLI’s AI capabilities to your specific workflow. Here's how to create a basic skill:1. Create a new directory for your skill: For personal skills, this would be inside `~/.gemini/skills/your-skill-name/`.
2. Create SKILL.md: Inside this folder, create a file named `SKILL.md`.
3. Define the Skill Metadata: At the top of SKILL.md, include frontmatter metadata describing the skill. For example:
```markdown --- name: "Generate React Component" description: "Creates a boilerplate React functional component with props and default styles." usage: "Use this skill to quickly scaffold new React components." --- ```
4. Add Prompt Instructions: Below the metadata, write clear instructions or example prompts that guide the AI on what the skill does.
5. Save and Test: Use the Gemini CLI to invoke your skill and verify it works as expected.
By following this structure, you ensure your skill is both human-readable and machine-executable.
Using Skills in Gemini CLI: A Practical Example
Suppose you want to create a skill that generates Python unit test templates for any given function. Here's a simple workflow:1. Create the Skill Directory: `~/.gemini/skills/python-unit-test-generator/`
2. Write the SKILL.md file:
```markdown --- name: "Python Unit Test Generator" description: "Generates unit test skeletons for Python functions using unittest framework." usage: "Input the target function code, and get back a unittest template." ---
Given the following Python function, generate a unittest test case class with test methods covering possible edge cases.
Function: ``` {function_code} ``` ```
3. Invoke the Skill:
In your terminal, run:
```bash gemini skill run python-unit-test-generator --input "def add(a, b):\n return a + b" ```
4. Review Output: Gemini CLI will generate a unit test class that you can immediately use or customize further.
This example demonstrates how you can create highly targeted skills that automate repetitive coding tasks, speeding up your development process.
Managing and Sharing Skills
Because SKILL.md is a markdown-based format, it's easy to version control your skills using Git. For personal skills, you can maintain a private repository under your home directory. For project skills, including the `.gemini/skills/` folder in your project's repository allows teammates to access the same AI capabilities, ensuring consistency.Moreover, communities around AI coding tools often share skill repositories publicly. You can contribute your skills or download others’ to expand your toolkit. When sharing skills, make sure to:
- Provide clear descriptions and usage instructions. - Include examples where applicable. - Test your skills thoroughly to avoid unexpected behavior.
This collaborative approach helps grow the ecosystem and makes AI-assisted coding more accessible.
Tips for Writing Effective SKILL.md Files
To maximize the usefulness of your Gemini CLI skills, keep these best practices in mind:- Be Clear and Concise: Your prompts should be easy for the AI to understand and act upon.
- Use Placeholders: Incorporate placeholders like `{input}` or `{function_code}` to make skills flexible.
- Include Examples: Demonstrate expected input and output where possible.
- Test Iteratively: Run your skills frequently during development to catch issues early.
- Version Control: Track changes to your skills to maintain a history and facilitate collaboration.
Applying these tips results in more reliable and maintainable skills.
Troubleshooting Common Issues
If you encounter problems when using Gemini CLI skills, consider the following troubleshooting steps:- Skill Not Found: Ensure your skill directory is correctly placed either in `~/.gemini/skills/` or `.gemini/skills/` within your project.
- Syntax Errors in SKILL.md: Validate your markdown syntax and frontmatter formatting.
- Unexpected Output: Refine your prompts for clarity and test edge cases.
- CLI Version Mismatch: Update Gemini CLI to the latest version to avoid compatibility issues.
Checking logs and error messages provided by Gemini CLI also helps pinpoint specific problems.
Conclusion
Gemini CLI’s support for the SKILL.md standard unlocks a powerful, flexible way to enhance your AI-assisted coding experience. By understanding where skills are stored, how to create and manage SKILL.md files, and practical usage patterns, you can customize your development workflows to be faster and smarter. Whether you’re automating routine tasks or building complex AI-powered tooling, mastering Gemini CLI skills empowers you to get the most out of Google’s AI coding ecosystem. Start experimenting today by creating your own skills or exploring community libraries to discover new ways AI can augment your programming journey.Frequently Asked Questions
Is this free to use? Yes — PromptSpace provides free AI prompts for any AI tool. Try them instantly with our free AI image generator — no account needed.Which AI model works best with these prompts? These prompts work across Midjourney, DALL-E 3, FLUX, and Stable Diffusion. Test in two tools to compare — results vary by model.
Can I use AI-generated images commercially? Yes on paid tiers of Midjourney, ChatGPT Plus, and Adobe Firefly. Always verify the specific platform's terms before commercial use.
How do I improve results if the first output isn't right? Add specific lighting, camera angle, and visual style references. Iterate 3–4 times with small changes to find the best output.